Category: Carrots


Soup!

A new soup recipe to start your February off right!  It’s a good day for soup today–as I write this it is a whopping -5 degrees outside with a windchill of -24 F.  Yeah, that’s right: -24.  But this hearty and spicy soup will warm you right up, and as an added bonus, it’s healthy too!

I actually didn’t originally intend for this soup to be a blog recipe–I came across Smitten Kitchen’s soup with lentils, sausage, chard and garlic while making my grocery list for the week, and had every intention of making it exactly according to the recipe.  Since our household’s resident vegetarian was going to be out for the night, I was excited at the prospect of trying my hand at a recipe using meat.  I figured I’d just make two pots, one with Italian sausage and one without so that my husband could share in the leftovers.

When I got to the grocery store, I discovered that sweet potatoes were on sale.  I like sweet potatoes, and I figured they’d go well with the Italian sausage, so I picked some up.  Then I went looking for the sausage itself.  The recipe called for sweet Italian sausage, which I found, but in my opinion Italian sausage should always be spicy.  Alas, spicy Italian sausage was nowhere to be seen.  Of course, I could just add my own spices after the fact, but I decided that if I was going to spice it myself anyways, I should buy something healthier.  That was when I saw the package of ground chuck.  It was three quarters of a pound–just the right amount given that I’d be the only one eating it.  Perfect.

At this point I was still intending to follow the recipe (just with the meat substitution and the addition of sweet potatoes), but I kept thinking about how big of a nuisance it would be to make two separate pots of soup (and how I didn’t really have two appropriately sized/shaped pots to do this), when finally the idea of doing meatballs popped into my brain.  I could make spicy meatballs to put in the bottom of my bowl with the soup, leaving the leftover soup untainted by meat so that my husband could share in it later!

So then I had to figure out how to make meatballs.  Because I’d never done it before.  (Yeah, yeah, I know–I write a cooking blog and I’ve never even made meatballs.  I’ve never made a steak either.)  But how hard could it be?  I figured I needed meat, breadcrumbs, and egg plus some spices, but I decided to consult Google just to be sure I wasn’t missing anything.

As it turns out, most meatball recipes call for fresh breadcrumbs.  From white bread.  With the crusts cut off.  Well, I didn’t actually have any white bread, crusts or no.  I had a jar of panko breadcrumbs.  And since it was freezing cold out, my car was covered in snow, and its door likely frozen shut, I decided to just go with it.

Panko!

In the end, panko worked just fine and the meatballs turned out to be juicy and flavorful.

Balls

Simmering meatballs

Since I decided to make meatballs, the soup was no longer going to have any contact with the meat, and thus was not going to get any of the flavors of it.  So I needed to up the spice content.  I decided to use the same spices I used in the meatballs (fennel seeds, smoked paprika, red pepper flakes, garlic powder, salt, and pepper) along with a star anise.  I also put this same combination of spices into the sauce for the meatballs.

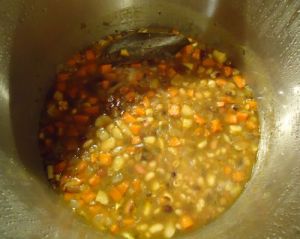
cooking the veg

In the end, this turned out to be a ridiculous amount of soup.  Unless I freeze some, I’m not going to have to grocery shop or cook for a week.  Which may be a good thing as I look at the weather forecast…

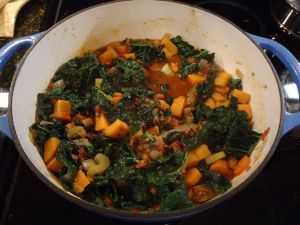
Sweet Potato Lentil Soup (with meatballs)
(serves 6)

Soup:

  • 3 tbsp grapeseed oil
  • 1/2 tbsp fennel seed
  • 1 whole star anise
  • 2 ribs of celery, sliced or diced
  • 2 large carrots, sliced or diced
  • 1 medium onion, diced
  • 2 medium or 3 small sweet potatoes, chopped into 3/4″ cubes
  • 1 tsp garlic powder
  • 1/2 tsp smoked paprika
  • scant 1/2 tbsp red pepper flakes
  • 1/4 tsp salt
  • a few grinds of pepper
  • 1 large bay leaf
  • 1 cup dry black lentils, picked over and rinsed
  • 1 can (14oz) crushed tomatoes (fire roasted if you can find them)
  • 3.5 cups water
  • 1 large bunch of kale, roughly chopped

Meatballs:

  • 1lb ground chuck (I used a bit less, but I thought the meatballs could have been a bit meatier)
  • 1 cup panko breadcrumbs
  • 1 large egg, lightly beaten
  • 1/3 cup freshly grated Parmesan cheese
  • 1/2 tsp garlic powder
  • 1/4 tsp black pepper
  • 1/4 tsp smoked paprika
  • 1 tsp fennel seeds
  • 1/4 tsp red pepper flakes
  • a small pinch of salt
  • grapeseed oil for frying

Sauce:

  • 1 can (14oz) crushed tomatoes (again, fire roasted if possible)
  • a small pinch of salt
  • a small pinch of smoked paprika
  • a few grinds of black pepper
  • a small pinch of red pepper flakes
  • a small pinch of garlic powder
  • 1 bay leaf
  • 1 whole star anise
  • a splash of water–just enough to thin it out

Heat the 3 tbsp of grapeseed oil in a large pot or dutch oven over medium heat.  Add the fennel seeds and star anise for the soup, and stir them around for a minute or two until they start to get fragrant.  Add the celery, onion, carrots, sweet potato, and all of the spices except for the bay leaf.  Cook the vegetables for a few minutes until the onions start to get translucent.  Then add the water, tomatoes, lentils, and bay leaf.  Stir, and then cover and simmer for 20 minutes.

After 20 minutes have passed, check on your soup, give it a stir, and then cover it and set a timer for another 20 minutes.  Combine the sauce ingredients in a pyrex measuring cup or other dish that pours easily.  Set aside.  Meanwhile in a large metal bowl, mix together your breadcrumbs, spices, and the Parmesan cheese for the meatballs.  Then add the ground chuck and beaten egg, and mix it with your hands until it’s just uniformly combined.  Yes, you should really use your hands, and be careful not to overmix (you don’t want the meatballs to be tough!)  Form the mixture into balls, about an inch and a quarter in diameter.  I ended up with 18 of them.

Add just enough grapeseed oil to just coat the bottom of a saute pan over medium high heat.  When the pan is hot (you can test this by gently setting one of your meatballs in it–if it sizzles, it’s hot enough), add all of your meatballs in a single layer, and use a pair of tongs to turn them occasionally until they’re browned on all sides.  How do you know when it’s time to turn them?  When they stop sticking to the bottom of the pan.  Seriously, don’t worry if they stick at first–they’ll come unstuck.  Once they’re browned on all sides, you can take the pan off the heat and skim out a bit of the excess oil if it seems like there’s a lot (do this quickly–you don’t want the pan to cool!), and then deglaze the pan with your tomato sauce mixture.  Be careful–it splashes.  Reduce the heat to low, and cover the pan.  Simmer for 10 minutes to cook the meatballs through.

Meanwhile, your soup timer has probably gone off.  Give the soup a taste, and check if the lentils are done.  If they’re not, keep the soup simmering.  Adjust seasonings as necessary, and then when the lentils are done, turn the soup down to low to keep it warm until the meatballs are ready.

Check the internal temperature of the meatballs–you want to see at least 165 degrees.  Make sure you check meatballs both in the middle of the pan and on the edges–mine cooked much faster on the edges of the pan than in the middle, so I ended up moving them around partway through.

Once the meatballs are done, put three of them in the bottom of a bowl, cover it with soup, and enjoy!

Did you know it’s possible to make tofu that doesn’t taste like feet?  No?  Neither did I!

But it IS possible.  And the results are delicious!  All you need to do is watch some Good Eats and buy a lime.  (Well, and some other stuff…more on that in a bit.)

You might be asking yourself why, precisely, I was cooking tofu the other day when I was firmly of the opinion that it tastes like feet and that there are far better ways to get protein (nuts, dairy, eggs, or for us non-vegetarians, meat).  Well, the answer is that my vegetarian husband picked up a package of tofu at the grocery store and wanted us to try and make it like some of the “good” restaurant tofu that’s out there.  And tofu *is* actually quite healthy.

Now I will admit that there are varying degrees of tofu awfulness, and that I have, on occasion (usually in Asian restaurants), had tofu that bordered on being edible.  But I had never yet found tofu that I actually wanted to eat (unless I were starving on a desert island somewhere.)  However, I do like a challenge in the kitchen, and I did want to find a way to add more calories/protein to my typical stir fry recipes so that we wouldn’t negate the healthiness of all the vegetables by gorging ourselves on gelato afterwards.  So I needed some help.  I turned to Alton Brown, who is pretty much always the best source of information on how to cook an unfamiliar ingredient.  Or a familiar one for that matter.

I remembered having watched the tofu episode of Good Eats, and since we never delete Good Eats off the dvr, it was a simple matter of endless scrolling to find it.  What I was looking for was this recipe: thick slices of firm tofu, marinated, battered with egg and fried.  I decided, however, to make my own marinade, since I intended for this tofu to go with Asian-style stir fried vegetables.  While the tofu slices were being squished to remove excess moisture and render them ready to soak up my marinade, I took stock of my pantry options.

Tamari soy sauce of course would be a key ingredient for the marinade.  Mirin and rice vinegar also seemed like good options to get a bit of acidity in there.  Sriracha of course would bring the heat, ginger and lemongrass would add another nice flavor dimension, and then I remembered!  I had a sad, lonely lime sitting in the fridge, left over from making the curry paste.  It was a bit ugly on the outside, having given up its zest to the curry, but the inside was still bright and fresh, and full of juice!  This, in the end, turned out to be the key marinade ingredient, and the main one that I was able to taste in the finished product.

Tofu taking a marinade bath

After the tofu had soaked in its marinade bath for half an hour (15 minutes per side), it was time to fry it.

Now I am notoriously bad at pan frying.  Either my oil isn’t hot enough and things get limp and greasy, or it’s too hot and it smokes, or the things that I’m frying fall apart (looking at you, potato pancakes!), or things get all squished and deformed when I’m trying to flip them…

But this time I was prepared!  With the aid of Alton Brown’s recipe, I was able to create a nice egg batter that stuck to the tofu.  I decided to go with grapeseed oil instead of canola oil for frying because grapeseed oil has a much higher smoke point–thus I would be unlikely to smoke it.  I had spring-loaded tongs at the ready for flipping the tofu, and a thermometer so that I could periodically monitor the oil temperature.

After heating up the oil, I gently placed the egg-battered tofu into the pan.  Instant sizzle – success!  I kept an eye on the temperature and after two minutes, flipped each piece–they were actually golden brown!  After another two minutes I removed them to a cooling rack over a sheet pan to drain.  They smelled good!  I assumed the pleasant smell was just the egg batter, but I was quite pleased that they came out looking like they were supposed to.

Golden fried deliciousness!

Meanwhile it was time to stir fry the vegetables.  I had already chopped them up while the tofu was marinating, and since the burner was still hot, it was a simple matter to grab another (larger) frying pan, add a little oil, and toss the veggies in.

Rainbow!

You might want to tie your lemongrass in a bundle for easy removal. Doing it this way was a mistake.

After the veggies had softened up a bit, it was time to deglaze the pan and get some flavor in there.  I had planned on just using the rest of the marinade to accomplish this, but I overestimated how much was left and underestimated how much I would need to create any sort of sauce.  So I added more tamari, mirin, and rice vinegar, along with a sizable squirt (okay, several sizable squirts) of sriracha, and more grated ginger.  I also added the broccoli and finely sliced Thai chiles at this point, because I didn’t want them to overcook.  I covered it with a lid that is rather too small for the skillet, but it was good enough to collect some steam to cook the broccoli faster.  After a few more minutes, it was done!

The lid is too small!

To assemble the dish, I started with a nice scoop of brown rice (which I had cooked with a bit of tamari and lemongrass, and which, miracle of miracles, did NOT boil over!), and then topped it with a healthy scoop of vegetables, and then put the lovely golden tofu brick on top and spooned a bit of sauce over the whole thing:

Isn't it pretty?

Pretty, aren’t they?

And then it was time to taste it.  I cut off a corner of the tofu, admiring the crispy egg crust, and popped it in my mouth.  And was shocked!  It tasted good!  Not just in an I-can-see-how-this-would-be-good-if-you-liked-this-sort-of-thing way, but in a legitimately I-want-seconds kind of way!  It was delicious!  There was no trace of the soy flavor I typically find so unpleasant.  Just crispy egg batter, a pleasant tang from the lime, and a soft texture somewhat akin to a fluffy quiche.  No longer could I say that I hated tofu.  Hats off to Alton Brown.  His tofu-cooking technique is without equal.

Asian-Style Vegetable Stir Fry with Delicious Tofu
(serves 4)

For the marinade:

  • 2tbsp tamari soy sauce
  • 1tbsp mirin
  • 1tbsp rice vinegar
  • the juice of one lime
  • several squirts of sriracha
  • a pinch of freshly grated ginger
  • 1 stalk lemongrass halved and separated

For the tofu:

  • 1 15oz block extra firm tofu
  • 1/3c all purpose flour
  • 2 large eggs
  • grapeseed oil

For the vegetables:

  • 1-2 tbsp grapeseed oil
  • 2 large carrots, sliced into rounds
  • 1 large or 2 small heads of broccoli
  • 2 watermelon radishes (optional)
  • 1 medium onion, roughly diced
  • 2 cloves of garlic, smashed and minced
  • 7-8 stalks of lemongrass, halved and tied in a bundle
  • 1-inch knob of ginger, grated
  • 2 green Thai chiles, finely minced
  • the leftover marinade
  • additional mirin, rice vinegar, and tamari in equal parts
  • sriracha (to taste)

For the rice:

  • 1c brown rice
  • just over 2c water
  • splash of tamari
  • 1 stalk lemongrass, halved and separated

Drain the liquid from your package of tofu, and then slice it and press the rest of the liquid out as per Alton Brown’s recipe.  A few minutes before it’s done, get out a container with a tight-fitting lid that’s big enough to fit the slices of tofu side by side.  Add in the tamari, mirin, rice vinegar, sriracha, lime juice, ginger and lemongrass and stir until the sriracha is fully dissolved.  Taste it, and add more sriracha.  (Don’t worry–you can add a whole lot and your tofu still won’t be spicy.)  When the tofu is ready, put it in the marinade, cover it up, and set aside for half an hour.  If the tofu isn’t fully submerged, flip it halfway through.

Meanwhile, wash and chop up all your veggies.  Be sure to mince the Thai chiles very finely because they pack some punch!  This is also a good time to get your rice started, since it will take a good half hour (more if you’re using wild rice) to cook.

If you happen to have two good skillets (and two good burners), you can fry the tofu and stir fry the vegetables at the same time.  The vegetables don’t take a whole lot of attention, and the tofu isn’t hard to fry.  But if you want to do them one at a time like I did, start with the tofu.  I followed Alton Brown’s instructions pretty much exactly, right down to the spring-loaded metal tongs.  The only change I made was to use grapeseed oil instead of canola oil.  This is not strictly necessary, but if you do use canola oil, keep a closer eye on the temperature.  Grapeseed oil is good to 420 degrees.  Canola oil varies significantly depending on how it’s processed, but the kind I have is only good to 375-400 degrees.  And I have made it smoke before.  Grapeseed oil seemed safer.  When your tofu is done, remove it to a wire rack over a sheet pan to drain off any excess oil.

For the vegetables, heat a little oil in your skillet and add everything except the broccoli and Thai chiles.  Toss/stir them around occasionally.  Once your vegetables have started to soften, deglaze the pan with the extra marinade plus equal parts additional tamari, mirin, and rice vinegar as well as some sriracha.  You want just enough to create some sauce in the bottom of the pan.  Add in the broccoli and Thai chiles, stir, and then cover to let the broccoli steam.

By the time your vegetables are done, your rice should also be done.  Put some rice on each plate, top with vegetables and a slice of tofu, spoon a bit of sauce from the vegetable skillet over the top, and enjoy!

You guys, I’m so excited!  The husband and I are headed off on our honeymoon tomorrow to Portland, Oregon for 10 days of food nerd awesomeness!  We have both a spreadsheet and a customized google map marking out all the places we want to try–it’s going to be awesome!  (Of course we also have lots of walking and hiking planned…have to do something to burn off all the ridiculous meals we’re going to be eating!  Plus there are awesome waterfalls near Portland!)  I’m planning on tweeting pictures of the food (and anything else cool that we come across!), so if you haven’t followed me on Twitter yet, please do!  Or not if Twitter’s not your thing–don’t worry, I’m planning a round-up blog post about the trip when we get back.

And now on to today’s recipe!  I made this a couple weeks ago but I hadn’t gotten around to actually writing up the post yet.  But this might just be one of my favorite recipes I’ve shared here.  It has just the right balance of flavors…sweet/sour/savory/salty/bitter, with just the right amount of spice.  The key is really the lime juice at the end.  The lime juice takes what would have been a pretty decent dish to a whole other level of flavor.  So don’t leave it out!  Added bonus: this dish is ridiculously healthy, what with the quinoa and the beans and the kale and such.  But it doesn’t *taste* like health food.  It just tastes good.

Colorful, isn't it?

So without further ado:

Quinoa Adzuki Bean Stir Fry

  • 1/2c quinoa (uncooked)
  • 1.25c water
  • 1/2tbsp tamari
  • 2 carrots, sliced into discs
  • 1 daikon, sliced into discs
  • 1 green pepper, sliced into strips
  • 1/2 habanero pepper, minced
  • 1/2 large white onion, diced
  • 1 can adzuki beans, drained (also rinsed if they contain salt)
  • 1 tbsp olive oil
  • splash mirin
  • 1 inch knob ginger, peeled and freshly grated
  • juice of 1 lime
  • 1 bunch lacinta kale, de-stemmed and roughly chopped
  • dash cayenne pepper
  • 1/2c sugar snap peas
  • freshly ground black pepper

Rinse and pick over the quinoa, then put it, the water, and the tamari into a pan over medium-high heat and bring to a boil.  Once it starts to boil, reduce the heat and simmer for about half an hour until all of the water is absorbed.  Keep an eye on it, both so it doesn’t boil over and so it doesn’t overcook.  If it finishes cooking before you’re done with everything else, take it off the heat, fluff it with a fork so it doesn’t stick and then set it aside.

Meanwhile in your largest skillet, heat the tablespoon of olive oil over medium heat.  When it’s hot, add the onion, carrot, daikon, ginger, and black pepper.  Stir periodically.  When the onion starts to get transparent, deglaze the pan with the mirin and add the kale and habanero.  When the kale starts to wilt, add the quinoa, green pepper, and adzuki beans.  Mix well.  When everything is heated through, remove it from the heat and add the sugar snap peas and a splash of tamari.  Pour in the lime juice, give everything a good toss to mix it all together and enjoy!

Carrot cake is delicious.  And I’ve made Smitten Kitchen’s version (layer cake style) with great success in the past.  Seriously, it was one of the most delicious cakes ever.  And I think I still have some in the freezer somewhere.  I may need to go thaw that out…

Unfortunately, carrot cake also tends to be ridiculously bad for you.  Now I’m not one to turn down delicious desserts just because they’re unhealthy–far from it!  I love dessert and I have a terrible sweet tooth.  I don’t buy in to all the sugar-free, low fat, fake butter, weird chemical trends.  However, I’m trying to eat somewhat healthier of late and (more importantly) I’ve been itching to try my hand at baking experimentation for a while!  So I wanted to see if I could make a version of carrot cake that was still delicious and moist but didn’t contain a cup and a quarter of oil.

Now baking is finicky.  Unlike cooking, where you have a lot of freedom to adjust things as you go along, with baking, if you measure wrong or add the wrong ingredient, there’s no way to salvage it once it’s in the oven.  I was always a bit hesitant to try experimenting because I didn’t want to have a lot of good ingredients go to waste.  So I decided that I needed to do some research.  I compared four different recipes: Smitten Kitchen’s recipe, Chuck Hughes’ recipe, Alton Brown’s recipe, and the recipe from Advanced Bread and Pastry (which is definitely a book you’ll want to invest in if you’re serious about baking like my husband is!).  By studying the recipes, I got a pretty good idea of the ratios of the different types of ingredients involved in making a carrot cake delicious.  So then I started to contemplate substitutions.

The first thing I decided I wanted to include was some banana puree.  I figured that since, like applesauce (a common healthier substitution for oil), bananas contain pectin, it would probably work to sub it in for some of the oil.  I also guessed that I could cut the sugar in the recipe since bananas are naturally sweet.

The next thing I decided to include was crushed pineapple.  Again this is a naturally sweet ingredient, and in fact is commonly included in many carrot cake recipes including Chuck’s, so I figured I could get away with it.  (Also it meant that I got to have a big glass of pineapple juice to drink since I drained the crushed pineapple before mixing it in.  I love me some pineapple juice!!)

I also substituted a quarter of the flour with whole wheat flour.  I seriously considered doing more–and in retrospect I probably could have gotten away with it–but I was already not entirely sure how these were going to turn out so I didn’t want to press my luck!

The results of all this tinkering were surprisingly delicious.  The muffins were soft and moist, with sweet bursts of chewy dried fruit in the middle (I used dried cherries and raisins).  While I wouldn’t call these muffins a health food, by making the substitutions of the bananas and pineapple, I was able to cut the oil content from a cup and a quarter down to just half a cup!  And I really don’t feel like lost anything by it.  I definitely think I’m going to keep playing with this recipe–I’d like to create a version that reads more like a cupcake, and I’d like to find a way to make cream cheese frosting healthier (because I’ve been known to eat it with a spoon.  I am a cream cheese frosting junkie.)  But I hope that this convinces you, like it convinced me, that with a little research, baking is definitely something you CAN experiment with, and the outcome can be delicious!

*Originally these were meant to be cupcakes.  And really, there’s a very fine line between sweet muffins and cupcakes sometimes.  And if you want them to be cupcakes, all you really need to do is frost them.  (You could also eliminate the dried fruit if that would make them feel more cake-y to you.  Feel free to play around!)

P.S. If you’re wondering about the lack of pictures, it’s because the muffins were all gone before I remembered to take any!  My apologies!

Carrot Cake Muffins
(makes about 24 muffins) 

  • 1.5c all purpose flour
  • .5c whole wheat flour
  • 1 tsp salt
  • 2 tsp baking soda
  • .5 tsp ground allspice
  • 1 tsp garam masala (or ground cinnamon if you prefer)
  • 1 tsp ground ginger
  • 4 large eggs
  • .5c canola oil
  • .5c mashed overripe bananas
  • .5c crushed pineapple, drained
  • 1.5c granulated sugar
  • 3c grated carrots
  • .5c raisins (optional)
  • .25c dried cherries (optional)

Preheat your oven to 350 degrees.  Line your muffin tins with paper liners.

In a medium-sized bowl, whisk together the two types of flour, the salt, baking soda, and the spices.  Set it aside.

In a large bowl, whisk together oil and sugar.  Then whisk in the eggs, and when they’re fully combined, mix in the mashed bananas and the crushed pineapple.  Then mix in the grated carrots.

Once the carrots are incorporated into the wet ingredients, add the dry ingredients to the wet and start to mix.  Use as few strokes as possible – you don’t want to overmix!!  When about half of the flour is mixed in, add the dried fruit if you’re using it.  Mix a bit more until everything is just combined.  If you can still see a little bit of flour here and there, don’t worry about it.  It will be fine.

Use a disher or an ice cream scoop to evenly distribute the batter into the muffin tins.  Bake for 18-20 minutes or until a toothpick comes out clean.  (It might take longer–just keep an eye on them!)  Let them cool in the pans for a bit, and then when they’re cool enough, take them out and put them on cooling racks to cool down the rest of the way.  (This is especially important if you’ve decided to frost them.  If not?  They’re really good while they’re still warm!)

I made this recipe back at the beginning of January, but only now have I finally found the time to post it.  It’s a good, hearty bean soup, spicy but not overwhelming, and good for warming up on a cold winter’s day.  Y’know, if it’s still winter where you are.  It’s certainly not here!

Bean Soup!

For the beans, I used Trader Joe’s 17 bean and barley mix–a colorful collection of beans, split peas, and lentils including everything from baby lima beans to blackeye peas to pearl barley.  But if you don’t have a Trader Joe’s near you, feel free to improvise and use whatever combination of beans, lentils, and split peas you like!  Do stick to dried beans rather than canned though, as dried will hold up better to the long cooking process.  (Plus they’re cheap to buy in bulk!)

For vegetables, I used onion, carrots and parsnips, which were what I had laying around in the bottom of the fridge.  You could certainly use other vegetables as well, such as celery or fennel…sweet potatoes would also go well with the spices in the soup–just dice them up into 1-inch chunks and add them at the same time as the beans.

Vegetables!

The strongly flavored spices in this soup contrast well with the relatively neutral flavors of the beans and lentils, as well as the sweetness brought by the carrots and parsnips.  But if you’re missing one or two of the spices, don’t worry–just use what you have.  And you can always adjust the flavors at the end.  But just to warn you, the cayenne pepper does give the soup a bit of a kick, so if you don’t like spicy food, just leave it out.

Spices!


Spicy Bean Soup
(serves 6-8) 

  • 1lb mixed dried beans, split peas and lentils (or 1 package of Trader Joe’s 17 bean and barley mix)
  • 3-5 medium carrots
  • 1 large onion
  • 2-3 medium parsnips
  • olive oil
  • 1 bay leaf
  • 1/3c white wine
  • 1/4 tsp paprika
  • 1/4 tsp ginger
  • 1tsp cumin
  • 1/2 tsp mustard seeds
  • 1 tsp coriander
  • 1/4 tsp cayenne pepper
  • 1/2 tsp turmeric
  • dash of dried cilantro
  • dash of crushed red pepper
  • water or vegetable stock
  • salt to taste

Soak your bean mix in cold water for several hours before you intend to start cooking (or overnight).  Drain and rinse.

Put a large stock pot on the stove over medium heat.  Peel and dice the parsnips, carrots, and onion, and when the pot is hot, pour in a good glug of olive oil and add the vegetables.  Let them cook for a bit, stirring occasionally, until the onion starts to go translucent.  Then add the wine and bay leaf, and continue to cook until most of the wine has cooked off.

Now add your spice mix.  After stirring it in, add your drained and rinsed bean mix, and enough water or stock to cover everything by an inch or so.  Bring the soup to a boil, then reduce the heat and let it simmer until the beans are cooked through and tender.  This will take about an hour, depending on how soft you want the beans.  Check the soup periodically while it’s simmering, and if it seems like a lot of the liquid has boiled off, add a bit more water.

When the beans are cooked through, taste the soup and add salt as necessary.  If you want it spicier, feel free to add another dash of cayenne pepper.  Serve as is, or topped with a dollop of sour cream.  Enjoy!

Lunch

Lunch!

This was my lunch yesterday–omelettes are my favorite way to use up leftover veggies!  Also, beets are curiously good in omelettes.  Not sure why I’d never tried that before.

And just like that a month goes by and it’s April.  Apologies again for the lack of posts–especially after I had promised you all new posts!  I do have one dish that I made during that week after my last post that I’ll write about later (it was a Thai-inspired curry dish), but it’s a new month and for now I’d rather write about something new!

I went to the grocery store this week at about quarter after 9 on Tuesday morning.  On the one hand, this is an utterly ideal time to go to the grocery store because (at least by this store’s standards), it is empty. No fighting people to get your cart through the aisles…heck, there are actually carts available! The downside, though, is that clearly their shipments of produce must arrive on Wednesday or Thursday because there was not a whole lot to choose from, and a lot of what was there was pretty sad.  I quickly had to scrap plans to get some kale, or my second choice of spinach.  I did find the last good bunch of big organic beets, so I do have beet greens to work with, and then I found some watercress.

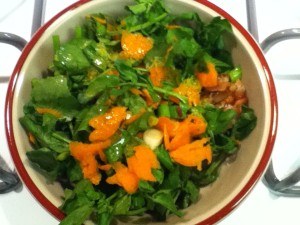
I’ve never bought watercress before.  I’ve had it a few times, mostly in foreign countries.  But it was one of the few greens they had that weren’t completely wilted and pathetic looking.  So I decided on the spur of the moment that I was going to make a watercress salad.  Which is weird for me since normally I don’t consider salads to be meals.  But I’ve had this for dinner the past two nights and it’s actually turned out to be quite good and filling.

But what else to put with the watercress?  I had bought pancetta for another recipe (I’m on a bit of a Jamie Oliver kick lately–more on that later), so that was definitely going to go in there.  I also wanted something sweet, but there’s not much in season right now in the fruit department (and the stuff from Chile is all coated in a thick layer of wax that’s impossible to remove!), so I decided to grate up a carrot, which worked out nicely.  I also added a couple green onions, just to get another flavor in there, and to tie it all together I made a dressing with lemon zest, lemon juice, olive oil, salt and pepper.  Finally, I topped the salad off with some grated Parmesan cheese.  All in all?  Definitely a recipe worth repeating!

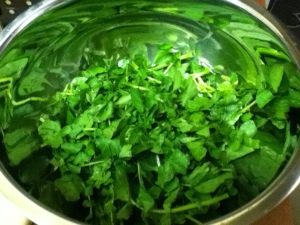
watercress

pancetta

lemon dressing

watercress salad


Watercress and Pancetta Salad

Salad

  • 1 bunch watercress, washed and picked over
  • 1 carrot, grated
  • 2 green onions, finely chopped
  • approx. 6 slices of pancetta or bacon (more or less to taste)
  • Parmesan cheese (to taste)

Dressing

  • zest of 1 lemon
  • juice of 1 lemon
  • olive oil (equal to lemon juice)
  • salt and pepper to taste

Wash and pick over the watercress, throwing away any bad leaves, tear it into bite sized pieces, and put it in a big bowl.  Grate the carrot and add it to the bowl with the watercress.  Chop the onions and do the same.  Cook the pancetta in a nonstick pan until nicely golden and crispy.  Tear it up and add it to the bowl.

To make the dressing, zest the lemon using a grater or microplane*.  Only get the yellow part of the zest–not the white part.  Put the zest in a bowl or 2 cup measure.  Cut the lemon in half and squeeze the juice in with the zest, being careful not to lose any seeds.  Add the olive oil, salt, and pepper and whisk it all together.  When you’re ready to eat, drizzle the dressing over the salad and top with a good amount of Parmesan cheese.


*Be VERY careful to keep your thumb away from the microplane.  Seriously.