Category: White Wine


Hi, everyone!  I am FINALLY back on my blog after several months of radio silence.  I’ve been away on campus teaching for the semester, and while I had originally intended to continue posting, there’s not much to say when your primary instrument of cooking is a microwave.  (If you were wondering, it is possible to successfully make pasta, beets, potatoes, and a variety of other things in the microwave.  But after a while you get lazy and just buy a lot of boxes of soup.)  I am super excited to get back to blogging, and I have some awesome recipes coming up including a butternut squash dish, a cake, a salad, at least one type of cookie, and, the subject of today’s post: mushroom barley soup!

I’m a big fan of barley.  It is both absurdly healthy and absurdly versatile–you can make it into a breakfast cereal, put it in soups, make it into a risotto, use it as the base of a dish like you would rice or couscous…

Except.

It takes forever to cook.

Oh, the pearled kind cooks up in a perfectly reasonable amount of time, it’s true.  But pearled barley doesn’t have nearly the nutritional punch that hulled has, plus it doesn’t have quite the same pleasing, chewy texture.

Solution:  slow cooker. With a minimal amount of planning ahead, I pre-cooked the barley overnight in the slow cooker, so that when it came time to make the soup, all I had to do was throw it in.  And it’s so easy to make barley in the slow cooker, you can do it while you’re sleeping.  Literally.  If you cook it on low, it’s ready in 6-8 hours max, which means that this is also an excellent way to replace your breakfast oatmeal with breakfast barley.  And in fact, I ended up with more cooked barley than I needed for the soup, so I had ready-made breakfast for the rest of the week!

The soup itself was something I came up with while falling asleep one night–it just popped into my head like a dream and practically wrote itself–when I made the soup a few days later, I felt like I was following a recipe, even though I was making it up.  It’s a good soup for a cold winter day–the hearty barley and beans along with the rich mushroom flavor and just a touch of sour cream warms you through without being heavy, and the topping of freshly grated Parmesan adds the perfect amount of umami.  (It would be a good thing to enjoy with a nice thick slab of oat soda bread from 101 Cookbooks.)

So here it is, just in time for Christmas:

Mushroom Barley Soup
(Serves 9)

For the barley

  • 1 cup dry hulled barley
  • 4.5 cups water

For the soup

  • 1/4 cup dried porcini mushrooms
  • 3/4 cup hot (not quite boiling) water
  • 2 tbsp butter
  • 1 medium onion, diced
  • 1 head of garlic, peeled, smashed, and roughly chopped
  • 3-4 cups sliced raw mushrooms (I used a mixture of crimini and white button)
  • 1/2 cup dry white wine
  • 4 cups mushroom broth
  • 1 can of navy beans, drained
  • half to all of the cooked barley
  • 1 large bunch of kale, chopped into bite-sized pieces
  • 1/3 cup sour cream
  • salt
  • pepper
  • Parmesan cheese (for topping)

The night before you plan on making the soup, get out your slow cooker and put in one cup of dried, hulled barley and 4.5 cups of water.  Give it a stir (and pick out any bits of chaff that may have been in with your barley), cover it, and set it to low for 8 hours.  In the morning, scoop it out, put it in a container, and pop it in the fridge until you’re ready to make the soup.

When you’re ready to make your soup, take your dried porcini mushrooms, put them in a small bowl, and cover them with hot water.  Let them steep while you get everything else going.  The water should turn a rich shade of reddish-brown, and the mushrooms will re-hydrate.

Meanwhile, in a large stock pot or dutch oven, melt two tablespoons of butter over medium-high heat.  When the butter is melted and the pan is hot, add in the diced onion and garlic, and saute until the onion starts to get transparent.  Then add the sliced mushrooms, and continue to stir occasionally until the mushrooms start to darken.  Deglaze the pan with the white wine, and let it simmer until most of the wine has cooked off.

Chop up the re-hydrated porcini mushrooms and add them to the pan, and strain in the liquid they were soaking in.  Add the mushroom broth, beans, and as much of the barley as you would like in your soup (more if you want your soup thicker like a stew, less if you want it more soup-like), and the kale.  Cover, and simmer until the kale has completely wilted.

Stir in the sour cream, and then add salt and pepper to taste.  It will probably take more salt than you think you need; just add it a little at a time.

Ladle it into bowls, top with Parmesan cheese, and enjoy!

Mushroom Barley Soup!

I made this recipe back at the beginning of January, but only now have I finally found the time to post it.  It’s a good, hearty bean soup, spicy but not overwhelming, and good for warming up on a cold winter’s day.  Y’know, if it’s still winter where you are.  It’s certainly not here!

Bean Soup!

For the beans, I used Trader Joe’s 17 bean and barley mix–a colorful collection of beans, split peas, and lentils including everything from baby lima beans to blackeye peas to pearl barley.  But if you don’t have a Trader Joe’s near you, feel free to improvise and use whatever combination of beans, lentils, and split peas you like!  Do stick to dried beans rather than canned though, as dried will hold up better to the long cooking process.  (Plus they’re cheap to buy in bulk!)

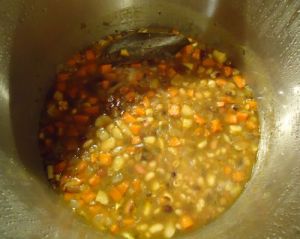
For vegetables, I used onion, carrots and parsnips, which were what I had laying around in the bottom of the fridge.  You could certainly use other vegetables as well, such as celery or fennel…sweet potatoes would also go well with the spices in the soup–just dice them up into 1-inch chunks and add them at the same time as the beans.

Vegetables!

The strongly flavored spices in this soup contrast well with the relatively neutral flavors of the beans and lentils, as well as the sweetness brought by the carrots and parsnips.  But if you’re missing one or two of the spices, don’t worry–just use what you have.  And you can always adjust the flavors at the end.  But just to warn you, the cayenne pepper does give the soup a bit of a kick, so if you don’t like spicy food, just leave it out.

Spices!


Spicy Bean Soup
(serves 6-8) 

  • 1lb mixed dried beans, split peas and lentils (or 1 package of Trader Joe’s 17 bean and barley mix)
  • 3-5 medium carrots
  • 1 large onion
  • 2-3 medium parsnips
  • olive oil
  • 1 bay leaf
  • 1/3c white wine
  • 1/4 tsp paprika
  • 1/4 tsp ginger
  • 1tsp cumin
  • 1/2 tsp mustard seeds
  • 1 tsp coriander
  • 1/4 tsp cayenne pepper
  • 1/2 tsp turmeric
  • dash of dried cilantro
  • dash of crushed red pepper
  • water or vegetable stock
  • salt to taste

Soak your bean mix in cold water for several hours before you intend to start cooking (or overnight).  Drain and rinse.

Put a large stock pot on the stove over medium heat.  Peel and dice the parsnips, carrots, and onion, and when the pot is hot, pour in a good glug of olive oil and add the vegetables.  Let them cook for a bit, stirring occasionally, until the onion starts to go translucent.  Then add the wine and bay leaf, and continue to cook until most of the wine has cooked off.

Now add your spice mix.  After stirring it in, add your drained and rinsed bean mix, and enough water or stock to cover everything by an inch or so.  Bring the soup to a boil, then reduce the heat and let it simmer until the beans are cooked through and tender.  This will take about an hour, depending on how soft you want the beans.  Check the soup periodically while it’s simmering, and if it seems like a lot of the liquid has boiled off, add a bit more water.

When the beans are cooked through, taste the soup and add salt as necessary.  If you want it spicier, feel free to add another dash of cayenne pepper.  Serve as is, or topped with a dollop of sour cream.  Enjoy!

It’s been too long since I last posted.  My time has been consumed with far too many books and not nearly enough cooking.  But at last I have survived my general exams and have time to get back in the kitchen!

I have a couple new recipes to write about, but I decided that this one needed to come first so that I wouldn’t forget what I put in it!  It was very much a make-it-up-as-you-go-along type of dish.  I bought the kale and mushrooms knowing that I wanted to put them with white beans, but aside from that I had no idea where I was going to go with this!

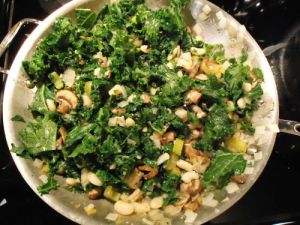
mushrooms, celery and onion

I ended up going in a garlicky, nutmeggy, peppery direction–because there was so much kale, the spices didn’t always get evenly mixed in, leading to bursts of different flavors in different bites.  If you want a more uniform flavor, it would probably be best to add all the spices prior to adding the kale to the skillet.

Speaking of the kale, you could really substitute any leafy green you like in this recipe–swiss chard, beet greens, lacinta kale or red kale would all work well.  Another addition that might be nice is bacon–if you fried the bacon in the same skillet with everything else, you could omit the butter and just use the bacon grease.  Bacon makes everything better, and gets along well with both beans and kale, but alas, it’s obviously not vegetarian-friendly.  If you do make this with bacon, though, let me know how it goes!

the finished dish

Mushroom, Kale and White Bean Skillet
(serves 4)

  • 4 big handfuls dried white beans (or 1 can)
  • 1 large bunch of kale (or other greens), roughly chopped
  • 12-15 crimini mushrooms, sliced
  • 1/2 large onion, diced
  • 3 stalks of celery, chopped
  • olive oil
  • 2tbsp butter
  • splash of white wine
  • 1 bay leaf
  •  thyme
  • oregano
  • garlic flakes
  • nutmeg
  • 1-2 pinches salt
  • freshly ground black pepper
  • crushed red pepper flakes
  • freshly grated Parmesan cheese

Soak your beans overnight, or at least for an hour or two prior to cooking.  (If using canned beans, simply rinse them off and skip the next few steps.)  Rinse off your soaked beans in cold water, and then put them in a medium-sized pan with enough cold water to cover them by at least half an inch to an inch.  Bring the beans to a boil, and then reduce the heat and simmer them until tender.  Keep an eye on them so they don’t boil over!

When your beans are almost done, put your largest skillet on to heat up over medium heat.  Once it’s hot, add a glug or two of olive oil, and then add the onion and celery.  When the onion is transparent, add a good splash of white wine, the bay leaf, thyme, oregano, and garlic flakes.  (This is not an exact science–just put in a good shake of each).  Stir everything around, and let the wine cook off.

While that’s going, slice up your mushrooms, and when the wine is almost gone, add the mushrooms to the skillet.  While those are going, you can wash and chop the kale.  Once the mushrooms have started to brown, drain off any water that was still in with your beans and add them to the skillet.  (Or add your canned and rinsed beans).  Add the nutmeg, salt, pepper, and red pepper flakes, as well as the butter.  Once the butter is melted, add the kale.  It will seem like a lot of kale, but it will lose a lot of volume as it cooks down.

Once your kale is cooked down, make sure everything is mixed thoroughly and taste your dish.  Adjust the seasonings according to taste, take it off the heat, and top it with freshly grated Parmesan cheese.  Enjoy!

Acorn Squash Risotto

I’ve been cooking a lot lately and I have so many new posts to write!  But this one had to jump to the head of the line because, well, you need to make it.  It’s delicious.

I only recently learned how to make risotto, but it’s actually really easy to do, if a bit labor intensive.  And it’s definitely worth the work.

The first thing I did was roast the acorn squash in the oven.  It’s really unpredictable how long it takes for a squash to get soft–a tiny one the other day took over an hour.  This one was much bigger and was done in less than 45 minutes.  So put it in for half an hour, and then just make sure you check on it every 10 minutes or so thereafter (unless it’s still really hard after half an hour.  Then give it another 20 til you check it.)  Once it was done, I set it aside and got started on the risotto.  You can start your risotto while the squash is still in the oven if you’re pressed for time, but you might end up burning your fingers on the squash when you go to scoop it out!

Ready for roasting

For the risotto, I started with half an onion in a bit of butter and olive oil, and once that softened up I added the rice.  I had wanted to use 5oz of rice but our kitchen scale is, most inconveniently, out of batteries, so I had to guesstimate how much rice to use and how much broth to make.  After some quick googling and a bit of math, I decided to go with 3/4c of rice and 2c of broth.  It’s not actually a big deal if you run out of broth though…you can always use hot water towards the end.  Just make sure you taste things so they’re seasoned enough.

Another couple keys to tasty risotto which I’ve picked up from watching Jamie Oliver: use 1/2 cup of white wine in the beginning before you start adding the ladle-fulls of broth.  It makes the most amazing smell once that wine starts to cook into the rice!  Also, let the risotto rest for a while at the end before you eat it.  It makes it better!

Risotto in progress

When the risotto was almost done, I stirred in (most of) the squash and corn.  I added it a little at a time, tasting as I went, because I wasn’t sure how “squash-y” the flavor was going to be.  I ended up not using all of the squash, but I had a pretty big acorn squash that I was using.  If you have a smaller one, you might end up using all of it.

Squash and corn are added in!

And then the cheese.  You really need a good melting cheese–fresh mozzarella is good, but you can use something with a stronger flavor if you like.  And then you need freshly grated Parmesan.  I would really stay away from using the stuff in the green canister if at all possible–it’ll do in a pinch, but it’s so salty and the flavor is really quite different from Parmesan you buy in a block and grate yourself.  So get yourself a grater and a brick of Parmesan!  You’ll thank me!

Acorn Squash Risotto
(Serves 4)

  • 1 acorn squash
  • olive oil (a drizzle and a splash)
  • 1 pat of butter 
  • 1/2 yellow onion, diced
  • 5oz or 3/4c Arborio rice
  • 1/2c white wine (I find dry works better)
  • 2c vegetable stock (I use Rapunzel cubes, but I halve what the box calls for)
  • 1/2c frozen corn, thawed
  • thyme
  • rosemary
  • oregano
  • 3 cloves of garlic, finely diced
  • 1 leek
  • salt and pepper
  • crushed red pepper flakes
  • 3oz fresh mozzarella or other melting cheese
  • a good handful of freshly grated Parmesan

Preheat your oven to 400.  Cut your acorn squash in half and scoop out the seeds, then place it face up on a baking sheet.  Drizzle it with a little olive oil and rub the oil in to the flesh.  Then cover it with aluminum foil and put it in the oven for 30 minutes.  Check it with a fork.  If it’s really hard still, set a timer for another 20 minutes.  If it’s getting soft, set the timer for another 10.  Check it again, and keep checking it at 10 minute intervals until a fork goes into it easily.  Then take it out of the oven and set it aside to cool.

Meanwhile, get out a small saucepan and pour the stock into it.  Keep it simmering on a back burner, and keep it covered so that it doesn’t boil off.  On another burner, get a medium-sized pan going on low heat (it was around 3 on my electric stove).  Add the pat of butter, a splash of olive oil, and the onion, along with a bit of salt and pepper, and a bit of thyme, finely chopped rosemary, and oregano.  I used dry herbs, but fresh herbs would make this even better.  Stir it around occasionally, and let it go for about five minutes until the onion starts to get soft.  While it’s cooking, scoop the flesh of the squash out of the skins and into a bowl.  Mix in the corn and then set it aside.

When the onions are ready, add the rice to the pan, and stir it around for about a minute or so until it’s well coated by the butter, oil and spices.

Pour in the wine, and stir it around more or less constantly until it gets absorbed by the rice.  Then you start adding your stock.  Add it one ladle at a time, stirring constantly, and wait until it’s fully absorbed before adding the next ladle.  By the time you’ve used most of your stock (maybe one or two ladle-fulls are left in the pan), your rice should be almost done.  Start adding your squash and corn to your risotto pan.  I added probably about 3/4 of the squash that I had, but if your squash was smaller, you might end up using all of it.  It all depends how “squash-y” you want the risotto to taste, so taste it periodically as you stir in more of the squash.  Then add in the leeks and garlic.

Mix it all together and let it continue to cook (while you continue to stir!)  The squash has a fair amount of liquid in it, so wait for it to thicken up a bit before continuing to add stock as before.  If you run out of stock and your rice still isn’t done, you can start adding hot water, but you probably won’t need much if any.

Once the rice is fully cooked, take your risotto off the heat.  Tear up the fresh mozzarella and toss that in, and grate in a generous amount of fresh Parmesan.  Add some crushed red pepper flakes (more or less, depending on how much of a kick you want to give it), and add salt and pepper to taste.  Then cover it up, and let it sit for several minutes to rest.

And that’s it!  Enjoy!